A collection of 64 combinable shaders for unity.
Contains tools, scripts and other features.
Also includes the 2D Interactive Wind asset for free.
Feel free to ask for support.
Discord ➞ https://discord.gg/nWbRkN8Zxr
Email ➞ ekincantascontact@gmail.com
Demo:
- Unity 2020.3 (or higher)
Shader Files:
- Standard
- Additive
- Multiplicative
- GUI
- Additive GUI
- 2D Lit URP
- 3D Lit URP
- 3D Lit Cutout URP
- 3D Lit Built-In
- 3D Lit Cutout Built-In
Information:
Each shader file contains the same 65 shaders.
Enable, customize and stack shaders however you want.
Performance:
When all effects are disabled, the shaders performs the same as the default sprite shader.
Because only enabled shaders and features use GPU performance.
Rightclick in your Project Window and click on "Create" → "Material".
You may want to create a folder for your materials to keep things organized.
2. Assign a Shader to the Material
Select your new material and look at the Inspector Window.
The shader selection can be found at the top of the material inspector.
For starters select "Sprite Shaders Ultimate" → "Standard SSU".
There are other shaders for other use-cases like GUI, 3D or 2D Lighting.
3. Assign the material to any 2D object (SpriteRenderer, UI Image, Particle System, ...)
You can assign the material to almost every 2D Object.
Either look for the Material Slot in the object's inspector.
Or drag the material from the Project Window onto the object in the Scene Window.
4. Enable and Customize Effects
Effects can be enabled and combined with each other (in Uber Shaders).
Customize properties in the Material's Inspector.
You should see changes on your 2D Object.
If you have any questions or need assistance please contact me 🙂
It can be attached to SpriteRenderers with the Full Glow Dissolve shader enabled.
using UnityEngine;

public class Example : MonoBehaviour
{
    Material material;

    int fadePropertyID;
    float fadeValue;

    void Start()
    {
        //Get material reference
        material = GetComponent<SpriteRenderer>().material;

        //Convert property name to id (improves performance).
        //You can see property names by hovering over them in the material inspector.
        fadePropertyID = Shader.PropertyToID("_FullGlowDissolveFade");

        //Set fade value to zero at start.
        fadeValue = 0;
    }

    void Update()
    {
        //Update while fade value is less than 1.
        if(fadeValue < 1)
        {
            //Increase fade value over time.
            fadeValue += Time.deltaTime;
            if (fadeValue > 1) fadeValue = 1;

            //Update value in material.
            material.SetFloat(fadePropertyID, fadeValue);
        }
    }
}Do not use EnableKeyword or DisableKeyword, use fade properties instead.
To see propery names you can hover over them in the material inspector.
If you have any questions or need assistance please contact me 🙂
They have no performance impact if they are disabled.
Shader Space:
Let's you switch the space in which shaders operate.
Here are some examples on how to use this feature.
World can be used for world-space transitions.
Object can be used for texture atlases or rigged sprites.
Screen can be used for screen-space transitions and so on ...
Shader Time:
Gives you various options regarding shader animation.
You can change the Time Speed or FPS of shaders.
You can also switch to Wave Time or a Custom Time Value.
Uber Fading:
Let's you simultaneously fade all enabled shaders in various ways.
Performance is not affected by amount of enabled shaders.
Uses Shader Space for Spread and Dissolve Fade.
Description:
Let's you apply the material to a texture and export the result.
Use Stack Amount to apply the material multiple times, which is useful for Gaussian Blur.
Will not preserve hdr glow or shader animations in the generated PNG File.
Make sure to have a Texture assigned to the Material or Sprite.
- Bloom Post Processing
- HDR
Glowing in UI:
Set the Render Mode of your canvas to Screen Space - Camera.
- Unity 2020.3 (or higher)
Shaders:
- GUI
- Additive GUI
Setup for Shaders with Patterns:
1. Set Shader Space to UI_Graphic or Screen.
2. If you used UI_Graphic either manually input the Width and Height of the RectTransform or add the ImageSSU component.
Information:
For Text components enable Is Text in the GUI Settings section.
For masked elements press [Ctrl] + [S] to update material changes.
- Unity 2020.3 (or higher)
- Universal Render Pipeline
Shader:
- 2D Lit URP
Information:
You will find the 2D Lit Settings at the top of the material inspector.
You can change the Normal Map, Normal Intensity and Mask Map.
Built-In Requirement:
- Unity 2020.3 (or higher)
URP Requirements:
- Unity 2020.3 (or higher)
- Universal Render Pipeline
Shaders:
- 3D Lit URP
- 3D Lit Cutout URP
- 3D Lit Built-In
- 3D Lit Cutout Built-In
Information:
You will find the 3D Lit Settings at the top of the material inspector.
You can change the Normal Map, Normal Intensity, Smoothness, Metallic and Metallic Map.
You can also enable Emission.
Backside Lightning:
The SpriteRenderer is a one-sided mesh.
Therefore the backside will display the same lightning as the frontside.
To have the backside lit separately you can duplicate the sprite,
set the Z scale to -1 and slightly move the duplicate on the Z axis.
Or you could rotate the sprite by setting the X scale to -1 and avoid the backside if your game is 2.5D.
How do I apply shaders to my spine character ?
Export your spine characters using straight alpha.
The default premultiplied alpha can cause unwanted outlines around bodyparts.
You can change the shader of the material that spine generated on import to one of my uber shaders.
For more information check out their official documentation.
How do I get a nice outline effect ?
Your texture atlas may need more padding for the outlines.
![[Image]](https://ekincantas.com/wp-content/uploads/2022/01/Spine-Outline-Hint.png)
Your mesh will also need enough padding to draw the outlines.
![[Image]](https://ekincantas.com/wp-content/uploads/2022/08/Spine-Mesh-Padding.png)
Next download and extract my little helper script by clicking here.
You need to duplicate the gameobject which renders your spine character (with the skeleton animation component).
Then remove the SkeletonAnimation component of the duplicate and add my SkeletonMimic component to the duplicate.
Drag the original gameobject with the SkeletonAnimation into the Skeleton Mesh field in the SkeletonMimic component.
Use the Sorting Group (generated when you added the SkeletonMimic component) to render the mimic right below the original.
Finally add a material with an Outer Outline shader to the mimic (which renders below the original character).
Make sure this material also has the spine character's texture assigned as it's Main Texture.
At runtime the mimic will keep referencing and following the original characters mesh, creating a nice outline effect without internal lines.
Shaders (can be stacked)

Strong Tint
Replaces the color of the sprite.
Intended for hit or death effects.

Add Color
Adds a color to the sprite.
Intended for hit or glow effects.
Inner Outline
Adds an outline on the inside of the sprite.
Outline can have animated distortion.
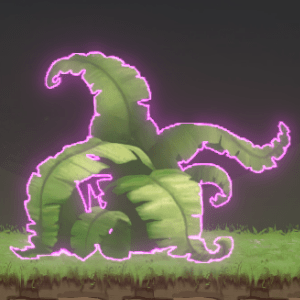
Outer Outline
Adds an outline around the sprite.
Outline can have animated distortion.
Brightness
Adjust the brightness of your sprite.
Saturation
Adjust the saturation of your sprite.
Hue
Adjust the hue of your sprite.
Contrast
Adjust the contrast of your sprite.
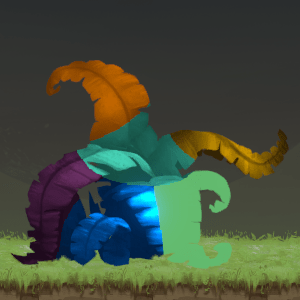
Recolor
Replace the color and contrast of up to 6 seperate areas.
Areas are defined in another texture as red, yellow, green, cyan, blue, purple.
Contrast is configured with the alpha of the tint colors.
Intended for color variations of sprites.
Ink Spread
Replaces the color of a spreading area.
Source Position can be in UV, Local or Worldspace.
Add Hue
Adds a hue shifting color to the sprite.
Shift Hue
Animated hue shifting of the sprite.
Black Tint
Changes the color of darker areas in the sprite.
Alpha Tint
Replaces the color of semi transparent pixels.
Intended as a cheap alternative for outlines.
Sine Glow
Adds a color but the intensity fades between two values with a frequency.
Can also be masked using a grayscale texture.
Color Replace
Replaces a target color with a new color.
Tollerances can be configured, no area texture required.
Split Toning
Tint brighter and darker areas with 2 different colors.
Can be used to adjust the color of sprites.
Hologram
Creates a hologram effect with lines, distortion and color replacement.

Frozen
Creates a frozen effect with color replacement and an animated highlight.
Also adds snow to the sprite.
Rainbow
Creates a rainbow effect by hue shift zooming towards a position.
Metal
Creates a metal effect with color replacement and an animated highlight.
Shine
Moves a shining line over the sprite.

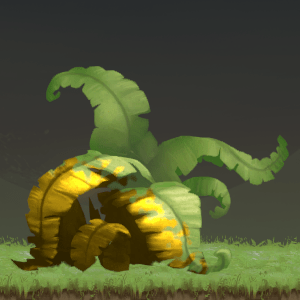
Burn
Spreads a burned area over the sprite.
Glitch
Creates an animated glitch effect.
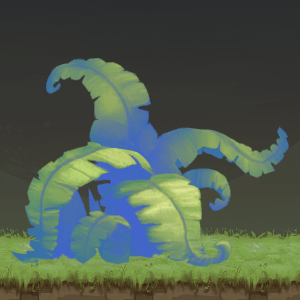
Poison
Creates an animated poison effect.
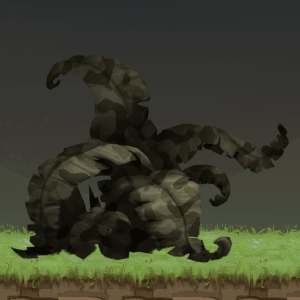
Camouflage
Creates an 3 color camouflage effect.
Can be animated.

Full Alpha Dissolve
Dissolves the entire sprite with a smooth edge.
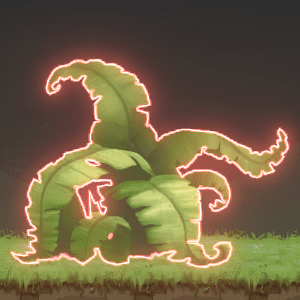
Full Glow Dissolve
Dissolves the entire sprite with a glowing edge.

Source Alpha Dissolve
Dissolves the sprite with a smooth edge from a source position.
Source position can be in UV, Local or Worldspace.

Source Glow Dissolve
Dissolves the sprite with a glowing edge from a source position.
Source position can be in UV, Local or Worldspace.

Directional Alpha Fade
Fades the sprite with a smooth edge from a custom direction.

Directional Glow Fade
Fades the sprite with a glowing edge from a custom direction.

Directional Distortion
Fades the sprite with a distorted edge from a custom direction.
Halftone
Fades the sprite with a halftone pattern from a source position.
Source position can be in UV, Local or Worldspace.

Full Distortion
Fades the sprite by uv distorting it.
Custom Fade
Tint Alpha no longer fades the sprite uniformly.
Uses a grayscale texture to define how the sprite fades.
Intended for particle systems.
Smoke
Tint Alpha dissolves the sprite towards the center
Also darkens the edges of the dissolve shape.
Intended for particle systems.
Flame
Generates a flame.
Use a white box as the texture.
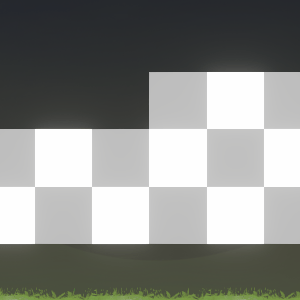
Checkerboard
Generates a checkerboard pattern.
Displays the worldspace units.
Intended for level design.
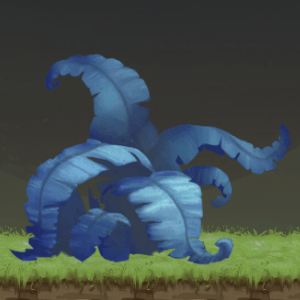
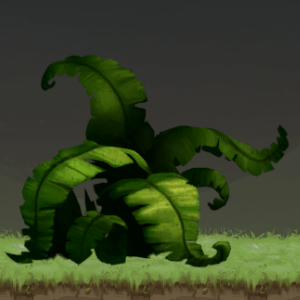
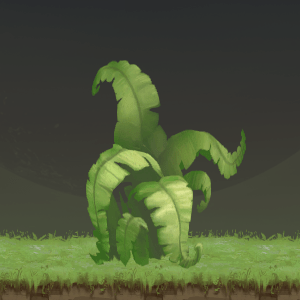
Wind
Bends, squishes and distorts the sprite.
Supports physical interaction and dynamic wind.
Click here for a detailed guide.
Squish
Squishes the sprite by moving the vertices.
Add the InteractiveSquish component to make it physically interactive.
Instructions for setup and demo included in asset.
UV Distort
Distorts the sprite.
Can be smoothly masked with a grayscale texture.

UV Scroll
Scrolls the UV of the sprite.
Can scroll horizontally and vertically at configurable speeds.
UV Rotate
Rotates the UV of the sprite.
Speed and pivot can be configured.
UV Scale
Change the UV scale of your sprite.
Can be used to fix pixel clipping of other uv moving shaders.
Sine Move
Moves the sprite using a sine function.
Configurable offset and frequency for X and Y axis.
Sine Rotate
Rotates the sprite using a sine function.
Configurable angle, frequency and pivot.
Squeeze
Squeezes the sprite by compressing the UV coordinates.
Pixelate
Pixelates the sprite by rounding UV coordinates.
Pixel density can be configured.
Vibrate
Vibrates the sprite by shaking vertices.