Post-Processing through Sprites Renderers , UI Images or Particles.
Contains 23 highly customizable and combinable filters.
Feel free to ask for support.
Discord ➞ https://discord.gg/nWbRkN8Zxr
Email ➞ ekincantascontact@gmail.com
Demo:
- Unity 2019.4 (or higher)
- Built-In Render Pipeline
Fading:
The alpha channel will fade all shaders.
So any sprite renderer, image or particle system fading will also fade the filters.
Additional options can be found in the Fade Settings section.
Rightclick in your Project Window and click on "Create" → "Material".
You may want to create a folder for your materials to keep things organized.
2. Assign the Overlay Shader to the Material
Select your new material and look at the Inspector Window.
The shader selection can be found at the top of the material inspector.
Select the "Overlay Filters" → "Overlay" shader.
3. Assign the Material to a 2D Object (SpriteRenderer, UI Image, Particle System, ...)
You can assign the material to almost every 2D Object.
Either look for the Material Slot in the object's inspector.
Or drag the material from the Project Window onto the object in the Scene Window.
4. Enable and Customize Filters
Filters can be enabled, customized and combined with each other.
Everything behind the overlay is affected by the enabled filters.
Multiple overlays can be stacked by layering them on top of each other.
If you have any questions or need assistance please contact me 🙂
Material Setup:
1. Expand the Space Settings section in the material.
2A. Set it to Screen for full-screen images.
2B. Or set it to UI Element for non-fullscreen images.
3. If you used UI Element you also need to fill in the Width and Height of the Image's RectTransform.
If you have a particle system using the overlay shader.
Do not use Fade With Alpha and use an Overlay Group.
Sprite Renderers:
If you have multiple sprite renders using the overlay shader.
Their sorting order or z position should be different.
If they are rendered at the exact same order, they won't overlap properly.
Which on most platforms does not affect FPS for 2D Games.
Performance Hints:
Using overlay-groups will significantly improve performance.
Only the first object within the same overlay-group will grab the screen-pixels.
Also make sure to disable overlays that are faded out.
Filters (look into the demo for combinations)
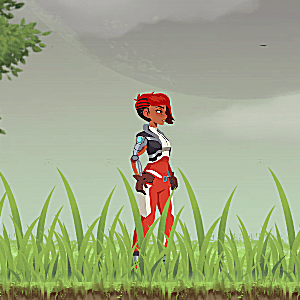
Unfiltered
The original for reference.
Reflect
Reflects the pixels above the sprite.
Combine it with other filters for a nice water effect.
*Only reflects pixels on screen (don’t move it too far up).
Gaussian Blur
Blurs the image smoothly.

Directional Blur
Blurs using a direction angle.
Sharpen
Sharpens the image.
Zoom Blur
Zoom blurs towards a center position
Ripple
Zooms into the image.
Intended for ripple particles.
Split Tone
Changes highlights and shadows to two different colors.
Single Tone
Changes the color to a single tone.
Distort
Adds a distortion effect.
Rainbow
Adds a zooming rainbow effect.
Snap Distort
Adds a snappy distortion effect.
Can be used for glitch effects.
Outline
Creates an outline with customizable colors.
The lines and fill color can be toggled for various effects.
Glitch
Adds a basic glitch effect.
Intended to be combined with other filters. (see demo)
Static Noise
Adds a static noise effect.
Pixelate
Pixelates the image.
Negative
Negates all colors.
Light
More realistic than a simple additive shader.

Brightness
Changes the brightness.
Contrast
Changes the contrast.

Saturation
Changes the saturation.
Hue
Sets the hue.
Limit Colors
Limits the palette by snapping saturation, hue and brightness.
More discernible in online demo. (gif is low quality)